RoadLab Setup
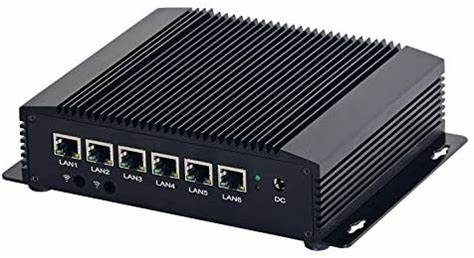
In my post Road to CISSP I mentioned my use of a Fanless PC with a Intel Core i3, 8GB of RAM and 6 ethernet ports
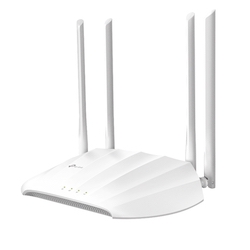
and a simple Wireless Access Point TP-Link AC1200.
This post describes the next steps I took in this road lab setup.
Purpose
For me the purpose of this setup is two-fold.
First I would like to have the same level of online security when I am not at home. The roles the server would have to fulfill:
- AdGuardHome (Ad Blocking Service)
- Media Streaming Service.
- Site-to-Site VPN back home.
- Selective routing to internet via the Site-to-Site VPN.
Second it is a nice technical challenge to do…
Storage
Initially I had a 64GB mSATA SSD in the device. Just for running OPNSense, more then enough space. However if I want to run more applications on the device. I would have to use a bigger SSD. Luckily the cost of these SSD’s dropped a lot. A 256 GB mSATA SSD is ordered and installed and now we move to the next steps.
Hypervisor
The solution is quite simple, run some hypervisor software on the device and it should be possible to simply run the needed applications. Proxmox is the one that comes to mind. Very easy to install and setup. It was simply a matter to install the ISO on a thumb drive, boot from it and do a series of next, next, finish steps.
OPNSense Installation
Installing OPNSense is simply a matter of uploading the ISO, creating a virtual machine, for me a VM with 4GB of RAM and 64GB of storage is more then enough for the my purpose. In Proxmox I have connected the desired network ports to the VM, and now it is possible to route the traffic via the OPNSense. Restored the backup of the previous setup and now I can continue with the configuration. The server is fast enough to also do some light switching, connected three of the six ethernet ports to the VM, made a bridge port in OPNSense and presto, built-in switch.
AdGuardHome
The reasoning for having a AdGuardHome instance is in 2023 obvious, a quick search resulted in this post: [How To] Set up AdGuard Home on OPNsense and as the writer clearly explains the reasoning why, I will refrain from paraphrasing. Suffice it to say that I agree wholeheartedly.
Following the ‘how-to’ resulted in a working AdGuardHome. At least all my DNS resolving is now handled using HTTPS connections. Only the resolving of the dns services is handled in using DNS via port 53. Using Cloudflare DNS server as my preferred server: 1.1.1.1. This type of unencrypted traffic does not need to go through the VPN.
Media Server
At home I am running Plex, it works. However I am not that happy with it. I would like to be able to play content without a active internet connection. I would like to be able to play content on several types of devices:
- iPad
- iPhone
- MacBook Pro
- Apple TV
When we go on holiday I take a Apple TV with me, and with this solution I can connect the AppleTV in most cases to the TV in the room or in the apartment.
There should be some alternatives. I have found Jellyfin to be quite nice looking and easy to setup. And best of all free. After some searching online in how to install, the best solution was to setup a LXE container. I have found a post online with debian, but I am more comfortable in Ubuntu. Change the template to a Ubuntu one and follow along. It worked flawless.
Would it be possible to connect the CT to the OPNSense VM? Yes, it is, create a linux ethernet bridge, connect the bridge to both the CT and the VM, configure it in both and done. Now there is a layer 2 network between the VM and the CT. Therefore it possible to SSH into the CT, if you have installed OpenSSH server off-course.
Allowing traffic from the road LAN to the virtual network connecting CT and VM, allows me to access the service, or any other service I like to run on the road lab. In case I have an interest in another service, connect it to the layer 2 network and assign it a different IP, should work out of the box.
Media Storage
Storing the data is pretty easy, there is a SATA connection on the motherboard of the device. And a small white connecter providing 5V for power. I found a cable on Amazon, having both the SATA data connection and a two wire power connection having a small white connector similar to the one I see on the motherboard.
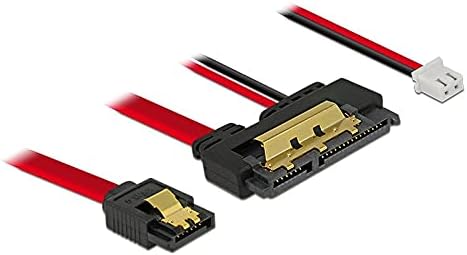
Should work, right? Wrong. Sadly it turns out that these white connectors are not really a standard. Loads and loads of different types of these similar connectors. I went to a local electronics shop. In the end a solution was found, a bit of this and that… I found a female header with 5 wires attached to it. Cutting the header to size placing the header over the pins, some hot glue and presto: two wires that provide 5V for power, now cutting the connector off and soldering the two wires. Next step; how big a SSD to buy; 2 TB should be big enough.
Installing the SSD is, again, a matter of hot glueing to the bottom of the case. Some nice hacks that do work.
Configuring the SSD in Proxmox is again straight forward. It directly is recognized, wipe and add a mount point of correct size to the CT Jellyfin. Now the space is available to be used. Using SFTP I can copy the data over. And manage the content with a browser.
Using a Wifi USB dongle as second type of WAN
Since it is possible that at the remote location there is no ethernet but only a “public” wifi network. I simply do not trust these WiFi networks. No idea what kind of stuff is running on these. It would be very nice to be able to use the public wifi as the second type of WAN. In most places I stayed there was always some sort of Wifi. The internet speeds are not always that great, but mostly fast enough for some surfing and reading emails. Since OPNSense runs on FreeBSD, a USB Wifi adapter is going to be a challenge. Support is limited. In the end I chose the
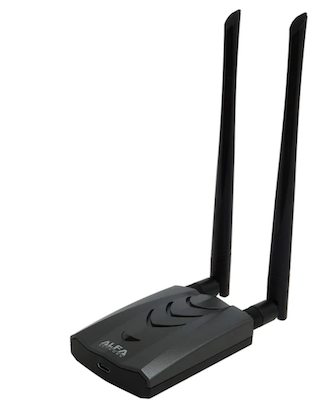
Alfa AWUS036ACH Dual Band USB-adapter for two reasons, I understood that the Realtek™ RTL8812AU chipset has the best native support in FreeBSD, and second I can use the device also when I am doing some pen-testing.
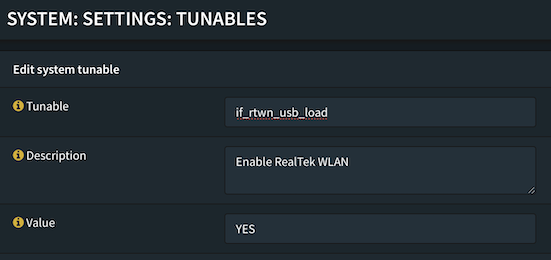
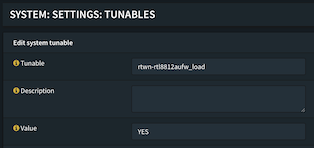
Enabling the driver support took a bit more research. In the end I had to add two tunables in the OPNSense config, you can find the tunables in: System:Settings:Tunables. I added these two attributes:
- rtwn-rtl8812aufw_load
- if_rtwn_usb_load
Both with the value of YES defined.
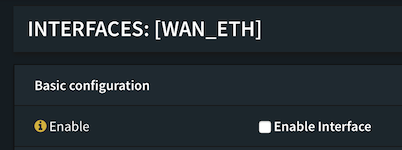
Rebooting the VM, connecting the USB device to the VM and ready to go. The usb-wifi adapter is now recognized. Configure it as a extra interface. Create a gateway out of the interface. In case you only have WiFi access, at the time of writing I do only have WiFi access, the easy fix is to be pragmatic about it and just simply disable the ethernet port. It is can be easily be enabled when I want to use it. I do not want to added complexity of creating a on-demand Multi-WAN setup. It is not mission critical and I (or my family) is relying on the services anyway.
When setting up the WiFi Interface, remember to allow private and bogon networks. Most likely you will not have a public IP attached to your WAN ports. Most hotels, resorts and such have a simple NAT based network within the RFC 1918 Private Networks ranges.
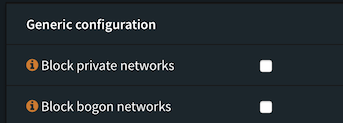
This setting is something you would have done for the ethernet port anyway.
Something I noticed was that the WifI connection lost its carrier. A cron job to the rescue, a Period Interface Reset. Adding the cron job can be found in the Web GUI at: System:Settings:Cron. For me the correct parameter for the interface is opt6, yours might differ. Als the interval in which it works best is something you will have to figure out yourself.
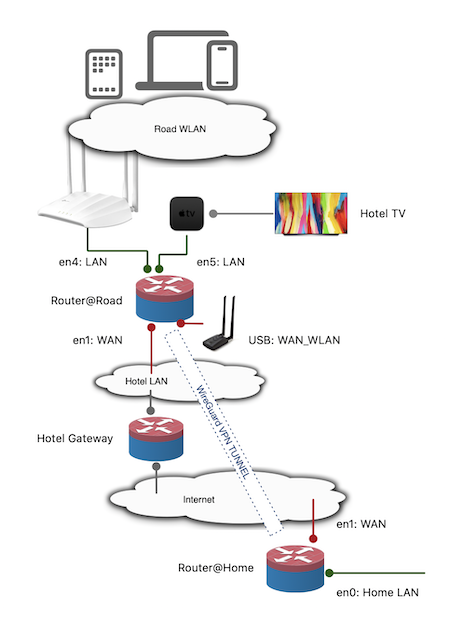
Site-to-Site VPN & Remote Breakout
As I mentioned before, I make use of OPNSense, and for our mobile devices I have setup a RoadWarrior VPN Setup.
Following the documentation on the OPNSense site was enough to get this working and providing a breakout from home. However since I do not have a fixed IP at home, some addition is needed. Strato provides dynamic DNS, having a sub-domain ready for this is the easy part. Next adding dynamic DNS to the gateway at home, is easy. Add the “os-ddclient” plugin to your instance, configure and ready. Documentation for both is readily available.
Preparing for the site-to-site connection
In order to test the site-to-site connection profile, I created a new profile on my Mac and created a new endpoint on the home gateway. Using the hotspot of my iPhone I was able to test the VPN connection. Great, it works! I am able to connect and breakout online via this Site-to-site profile. As expected, by the way.
Site-to-site and breakout
On the OPNSense documentation site are several how-to’s written on getting site-to-site working. However I want something else as well. I want to route all road LAN traffic from selected devices through the tunnel. Selective Routing is the answer. I had to make some small changes to fit my setup.
In step 1, I have augmented the “Allowed IPs” with the subnets from both the home LAN and the WG VPN. By adding these subnets I am enabling access to my LANs at home. I also made sure to have the same list in the profile in the RoadLab OPNSense instance.
In the endpoint config on the gateway I added 15 for the Keepalive setting.

Following the steps is straight forward, one small but important note: follow these to the letter, miss a small step results in big and small failures. After a extra restart of the WireGuard VPN service working with a site-to-site and remote breakout from wherever I am, online I never left home…
Conclusion
All in all a lot of work, I have spend over 60 hours on this setup. For me, time well invested. The benefits are there. The system does require constant monitoring, the type of internet connection determines this. At the time of writing the WiFi internet access is spotty at best. Also the amount of bandwidth is an issue. In most cases it will be limited. Resulting in frequent restarts of VPN Service and manual reloads of the WiFi USB Adapter. Even after ten days I had to restart the whole device, both USB devices were no longer detected in Proxmox. Perhaps having a small Zabbix instance running to monitor and automate a restart of services might help. (Seems like another project for another rainy day. And perhaps a bit overkill? 😃 )
Working with Proxmox turned out to be very easy and even the upgrade I did from 7 to 8 was a matter of next-next-finish. The options are limited only by the chosen hardware.
When traveling it is very convenient and more secure with this server. It enables me to work from anywhere with the same level of security as I do at home. And when I drive to the off-site location, the weight and such is not really an issue.
Seeing that road LAN traffic, from the selected devices, being routed through the VPN is very rewarding. And yes, the other traffic will go through the “normal” connection. Which is fine, the AdGuardHome is using HTTPS. And I do not need to update the CT Jellyfin that often anyway.
Network speeds are limited to the internet connection provided. Luckily the bandwidth at home is big enough to route this traffic in and out.
Having your own Road Media storage and streaming service really makes it even more comfortable on those rainy days in the mountains with a slow internet connection.
For now it works and reasonable well. The solution serves most common found connectivity situations. Adding a 4G USB dongle or 4G to ethernet modem/router would make it even better. However no need to have my own 4G at the moment.
(Future) next step:
- Adding 4G WAN Connection